If you have spent time in the world of fitness you have probably heard the jokes and seen the memes touting “Don’t skip leg day!” I can only imagine this saying originated from gym goers who were following a bodybuilding protocol and who put emphasis on developing the quintessential physique- ripped abs, chiseled arms, and mountain peaks for biceps.
Don’t skip leg day!
On the other hand, if you have been in the CrossFit community you are aware that it is practically impossible to skip so called “leg day” in a CrossFit workout because the CrossFit training methodology is based on training for functionality rather than display. The emphasis in the CrossFit world is on developing basic life movement patterns such as getting out of bed, getting on and off the toilet, walking, lifting, running, or jumping – all of which typically require the use of one’s legs. The development of these functions as seen in CrossFit, or any methodology that cares about developing such abilities, can be attributed to the king of all movements – The Squat.
Regardless of your physical development and background you probably have a mental picture of a squat – a crouching body position which to get into requires one to lower one’s body as close as possible to the ground by bending at the hips, knees, and ankles, and reversing that to get back up into a standing position.
Although we have plenty of proficient coaches out in the world with enough knowledge to write multiple books on the subject, the so called experts still struggle to teach the squat to their athletes and clients.
Most coaches in the fitness industry, myself included, could go on a rant here describing the importance of the squat for making you stronger and more prepared for any physical endeavor. Take powerlifting, for example – the squat comprises a third of the sport, being one of the three movements performed (squat, bench press, deadlift). In Olympic weightlifting the squat is a key to success in all the lifts performed. Outside of sports, anytime one performs a basic life function such as sitting down on the couch, one is performing a variation of the squat. In short, squatting is everywhere.
As fundamental as the squat may be, and the amount of utility found within the development of this movement, many of us struggle to perform the squat. Moreover, although we have plenty of proficient coaches out in the world with enough knowledge to write multiple books on the subject, the so called experts still struggle to teach the squat to their athletes and clients. It was within this struggle that my Old Man Squat progression was born.
The Old Man Squat
Several years ago I was training my dad on a family holiday vacation and I was at a roadblock communicating how to optimally perform a squat. It’s possible that I did not have a complete technical understanding of the movement at the time, or perhaps I was projecting an ideal on my father which was impossible for him to meet at that moment. Either way, I attempted several scaling techniques, such as having him sit on a chair, squatting with a wall as a support, and cueing his chest up. None of these methods worked for him. After failing with those squat methods I decided to explore a different route.
My observation of his performance on the previous squat tests led me to believe that one of the things he lacked was an understanding of the basic act of squatting. This lack of understanding led him to make obvious awkward moves trying to match what I was attempting to instruct to him. The awkward moves included lifting his heels, bending at the knees first, not using his hips, and extreme rounding of his back. I decided to start by prioritizing the movement at joint level first and came up with a simple way to demonstrate how to develop the squat from the hips into the knees, and then subsequently into the ankles without stressing about what was happening at the spine.
I came up with a simple way to demonstrate how to develop the squat from the hips into the knees, and then subsequently into the ankles without stressing about what was happening at the spine.
I wanted a squat progression that first developed an understanding of how to move the hips, followed by a pattern in which moving the hips in coordination with the knees and ankles would lead to a final product where the spine would naturally line up into what could be considered an optimal position. This progression may seem contradictory to the common knowledge in movement development on prioritizing the spinal position over joint movement, but because there is no extra load bearing on the spine, this type of flexed spinal position (rounded back) is safe.
3 steps for performing the Old Man Squat progression:
- Hinge and Touch
- Hinge, Touch, and Drop
- Hinge, Touch, Drop, and Lift
Many coaches cue their athletes to push their hips back in order to flex the hips before bending in the knees and ankles. Even though this cue is effective for assuring that the primary joint (the hip) is moving first and effectively, it can be problematic. This cue is potentially problematic because in a well developed squat the hips, knees, and ankles move at the same time, rather than in isolation. Usually the “hips back” cue is paired with a “chest up” cue, which could cause the person performing the squat to lose control of their lower back, knees, or foot position.
These cues, which were meant to simplify the coach’s instruction, can confuse the athlete and compromise their performance. Rather than asking the athlete to focus on hip movement during a squat, we can instead simplify or block the squat in a way that almost forces the athlete to focus on the hip movement pattern without compromising the movement at knee and ankle level, making the knee and ankle movement an extension of what is happening at hip level.
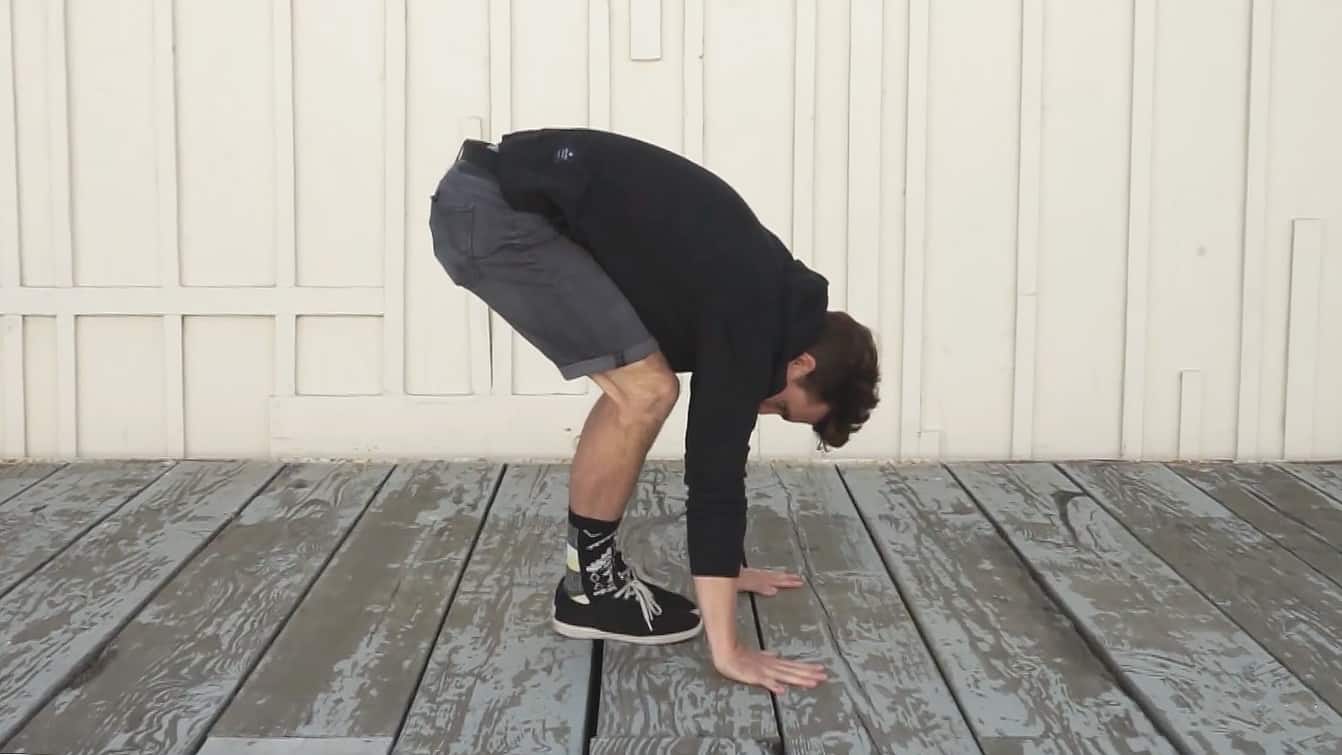
(1). Hinge and Touch
This first step involves bending over and placing your hands flat on the ground with as much knee bend (flexion) as needed. Your hips should always stay above your knees. In order to keep the focus of this movement on the hips, you can perform it with your feet together so that your knees are forced to track correctly when they bend. This is a great example of the blocking progression method.
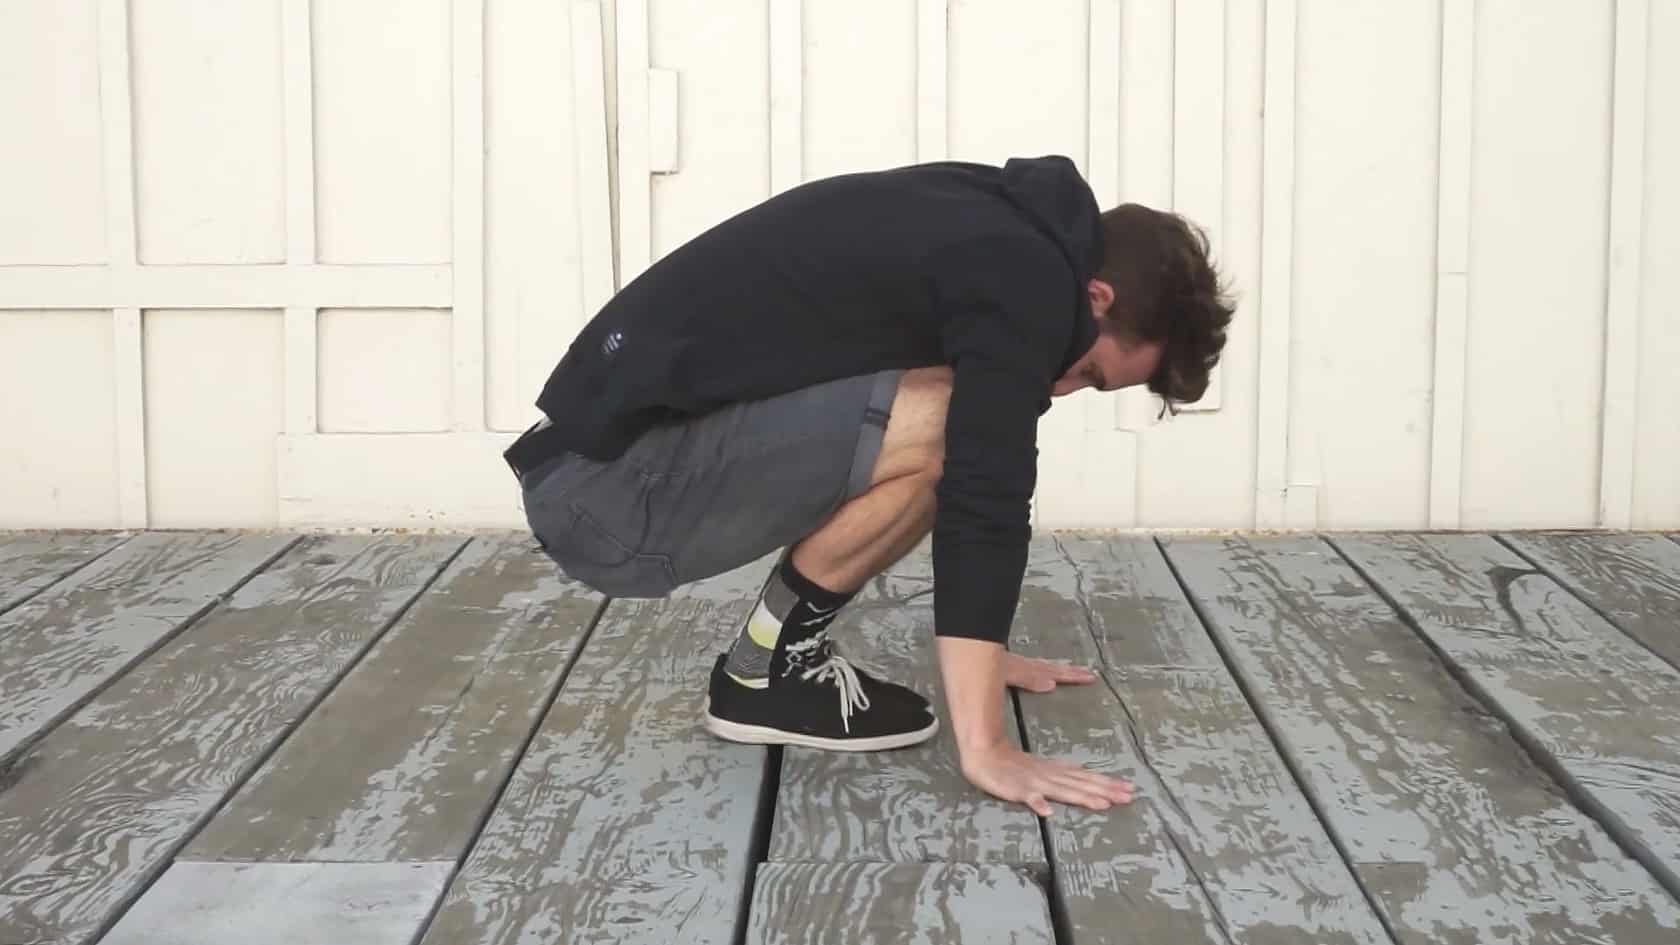
(2). Hinge, Touch, and Drop
This step adds a hip drop to the hinge and touch. Once you are at full hinge (when your hands are flat on the ground), lower your hips towards the ground. This movement can be performed with the feet together, however, it is easier to do with feet apart, as it starts to resemble the desired squatting mechanics. Any hip flexion creates external rotation at the hip, so the knees will naturally track outward.
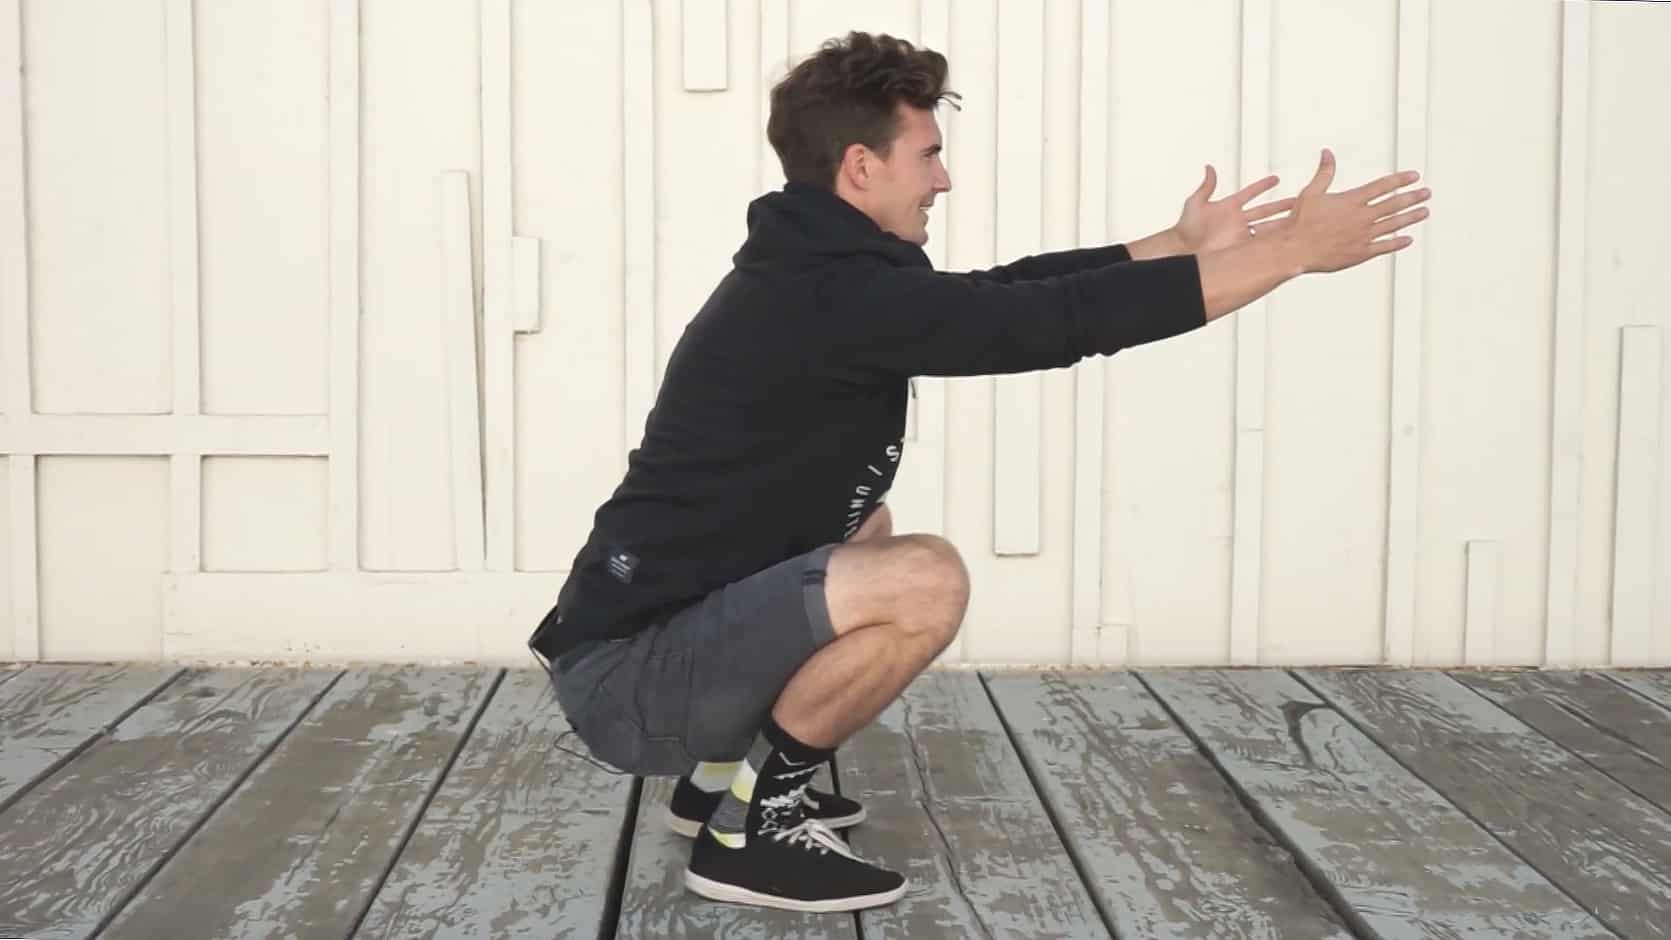
(3). Hinge, touch, drop, and lift
Now that your hips, knees, and ankles are reaching the bottom of the squat position you can focus on your spine by lifting your arms overhead, or as far overhead as you can reach according to your movement/mobility ability. You can see in the photos that my back is a little rounded; this is okay because I am not carrying a load and the stress on my spine is not harmful. Depending on your mobility, you will have more or less rounding in your back and straightness in your legs. Finishing with your arms overhead is beneficial because it relates to many other movements and the tension it creates in your back reinforces a neutral spine.
And there you have it! Next time you are coaching the squat, give this a try as a warm up or movement preparation to optimize the mechanics seen in the squat position itself. For more information, you can reference Freestyle the book, page 106, chapter 4, part 2. You can also watch this video addressing The Old Man Squat flow.
Contributor: Carl Paoli